Adhesive Failure: Surface Energy, Contamination, Texture, and Time
TLDR
If you are investigating “why labels do not stick surface energy,” start with contact rather than tack. A pressure-sensitive adhesive must spread across the actual substrate closely enough to form a continuous bond. Low-surface-energy plastics such as polyethylene and polypropylene resist that wet-out, but contamination, texture, curvature, cold application, inadequate pressure, and insufficient dwell can produce similar failures. Clean and test the real part, confirm the adhesive is intended for the substrate and environment, and do not approve a label from an immediate thumb-press test.
The practical distinction is between a preparation problem and a specification problem. Cleaning can remove oil, wax, polish, dust, or processing residue. It cannot turn ordinary polyethylene into a naturally high-surface-energy material. If a clean production part still rejects the adhesive, the answer is usually a more compatible adhesive, a controlled surface treatment, a construction with less lifting stress, or some combination of those changes.
Why surface energy controls whether labels stick
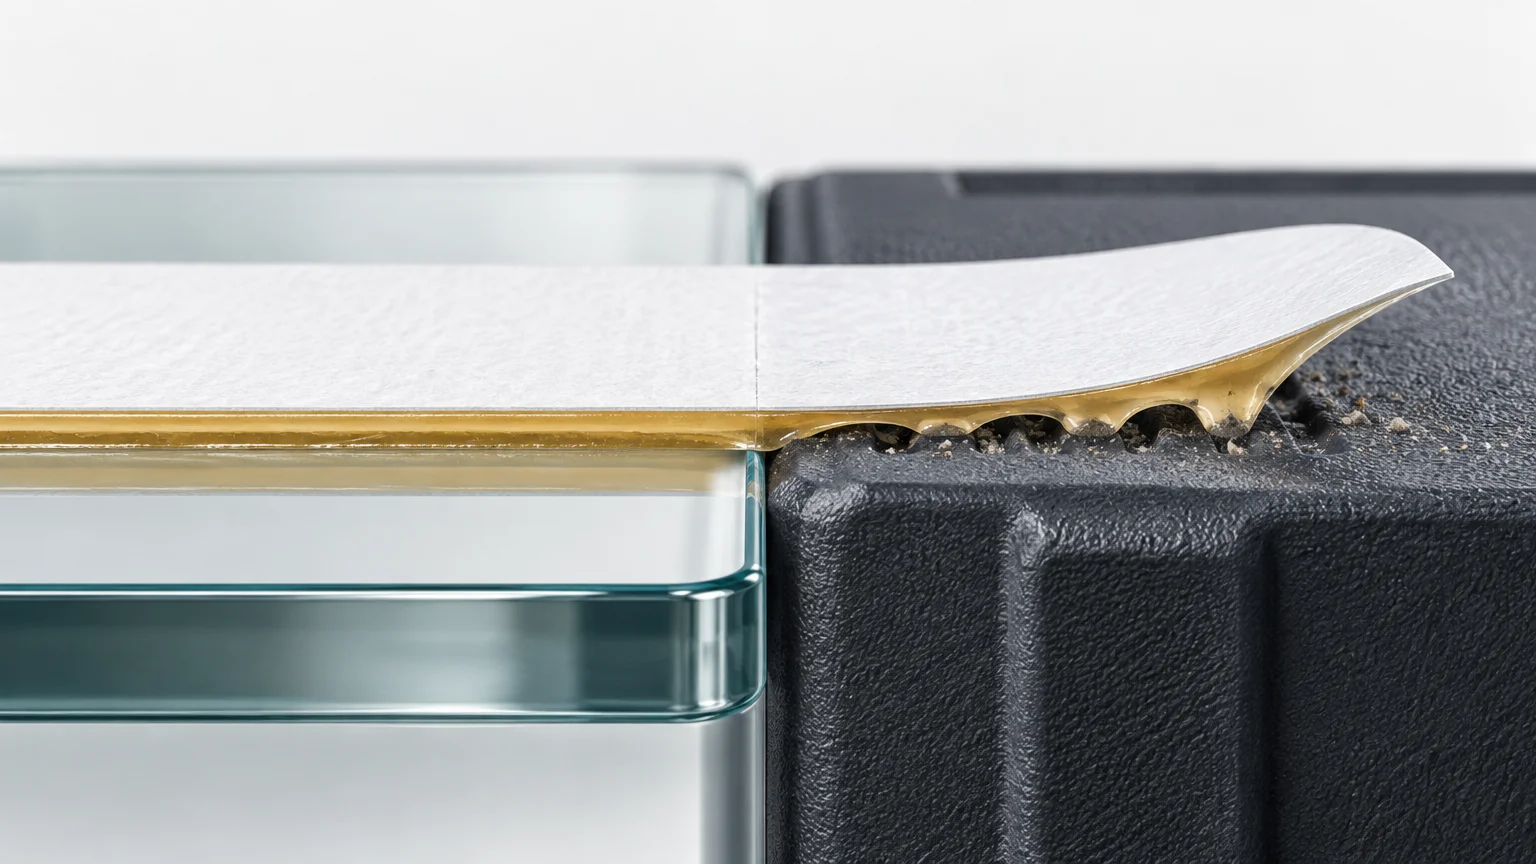
Pressure-sensitive adhesive, or PSA, is designed to bond when pressure brings it into contact with a surface. It does not work simply because it feels sticky. The adhesive must wet the substrate: it has to flow across microscopic peaks, valleys, and chemical variations instead of sitting on top in partial contact. Surface energy affects how readily that spreading occurs. Close contact is central to PSA performance, while poor wettability and roughness reduce the real area available for bonding.
A useful analogy is water on clean glass versus water on a waxed panel. On clean glass, the water tends to spread. On wax, it beads because the surface does not favor wetting. An adhesive is much more complex than water, but the visible difference captures the production problem: a label can appear to cover the entire part while its adhesive contacts only a fraction of the microscopic surface.
This is why the same label may bond well to glass or painted metal and release from a polypropylene tote. The label has not necessarily become less sticky. The adhesive-substrate pair has changed. 3M categorizes polyethylene, polypropylene, and PTFE as difficult-to-bond low-surface-energy materials and describes surfaces below roughly 36 dynes/cm as low surface energy.
Approximate surface energy is a clue, not a pass/fail limit
Published values help classify the problem, but they are not acceptance specifications for a finished label. One 3M comparison lists the following approximate values and warns that formulations can change them. Additives, coatings, processing residue, weathering, and the topmost layer presented to the adhesive all matter.
| Surface or condition | Approximate surface energy | Likely bonding issue | Production response |
|---|---|---|---|
| Clean metal or glass | Not assigned here | Usually wets more readily, but contamination can still block contact | Clean appropriately and verify the adhesive against the coating or finish |
| Rigid PVC | About 39 dynes/cm | Often easier than PE or PP, although plasticizers and formulation changes matter | Test the exact grade and aged label construction |
| ABS or polycarbonate | About 42 dynes/cm | Generally more favorable wetting than common polyolefins | Confirm cleaners do not damage or stress the plastic |
| Polypropylene | About 29 dynes/cm | Low surface energy can prevent adequate wet-out | Specify an adhesive intended for LSE plastics or evaluate controlled treatment |
| Polyethylene | About 31 dynes/cm | Low surface energy; grade and processing history can vary | Test actual production parts rather than relying on the resin name |
| PTFE | About 18 dynes/cm | Extremely difficult for conventional PSA systems | Seek a purpose-designed bonding system and supplier validation |
| Rough or textured coating | No single useful value | Adhesive bridges over valleys, reducing real contact area | Consider a more conformable adhesive coat and higher controlled application pressure |
| Oil-, wax-, polish-, or silicone-contaminated part | Measured value may mislead | The adhesive contacts the contaminant rather than the intended substrate | Identify and remove the residue with a compatible process before testing |
Material names are not enough. “PP” identifies a polymer family, not the exact surface presented by a molded bin, appliance component, or flexible package. Mold-release residue, slip additives, recycled content, coatings, and storage conditions can change behavior. A specification should identify the finished surface and part-making process, not merely the nominal resin.
Surface energy is only one failure mechanism
Contamination creates a weak boundary layer
Grease, oil, wax, polish, dust, fingerprints, and manufacturing residue can prevent an otherwise suitable adhesive from reaching the substrate. The label may bond to the contamination and then lift with that weak layer. Avery Dennison’s preparation guidance identifies grease, oil, wax, and polish as contaminants requiring removal; for lighter grease and oil, it describes dry wiping followed by cleaning with isopropyl alcohol.
Treat that as supplier guidance, not a universal solvent prescription. A cleaner must be compatible with the substrate, coating, print, and workplace controls. It must also evaporate without leaving another residue. Apply the label only after the surface is dry. If the part continually blooms additives or receives mold release during production, a one-time cleaning experiment may not represent the repeatable factory process.
Texture reduces real contact
A textured panel may look flat at label scale but resemble a landscape at adhesive scale. A thin or relatively firm adhesive can touch the high points while spanning the valleys. More thumb pressure may improve the initial appearance without creating durable contact throughout the area. Rough powder coating, embossed plastic, cast surfaces, and pebbled cases therefore need testing with the exact adhesive coat and label construction.
Curvature adds continuous lifting stress
A stiff facestock wrapped around a tight cylinder tries to flatten again. That restoring force concentrates stress at the label edges. A bond that is adequate on a flat test plaque may flag on a small bottle, cable, or curved tool handle. Smaller labels, more flexible facestocks, rounded corners, and a compatible adhesive can reduce the stress, but the assembled geometry must be tested.
Pressure and temperature control initial wet-out
Application pressure pushes the adhesive into closer contact with the real surface. Avery Dennison describes approximately 2 kg/cm² as typical pressure for maximum adhesion in many cases, but that is supplier guidance rather than a universal machine setting. A production team should instead establish a repeatable roller, squeegee, or applicator setting for the chosen construction, ensuring pressure reaches edges without stretching the facestock or damaging the part.
Temperature changes how readily many adhesives flow. A label applied to a cold bin in an unheated dock may not wet out like the same label applied under the conditions specified on its technical data sheet. Service temperature is a separate question: surviving a freezer, hot-fill process, outdoor cycle, washdown, or chemical exposure is not the same as being suitable for application at that temperature.
Bond strength develops over time
A PSA can look acceptable immediately yet remain vulnerable because it has not finished flowing across the substrate. Avery Dennison notes that some systems can require up to 72 hours to flow over the surface. That figure is not a mandatory dwell period for every label. It shows why an immediate peel test and a test after the supplier’s recommended dwell can give different results.
Do not confuse dwell with repair. Time may strengthen a compatible bond that has adequate initial contact. It will not reliably overcome heavy contamination, severe texture, an incompatible adhesive, or strong edge stress.
Read the failure pattern before changing the artwork
The location and timing of release can narrow the diagnosis, although no pattern proves a single cause.
- Uniform, clean release across the label suggests poor wet-out, an adhesive mismatch, low application temperature, or broad contamination.
- Lift concentrated at one edge suggests handling damage, a contaminated edge, insufficient applicator pressure, or stress from curvature.
- Small unbonded islands can correspond to texture, trapped debris, bubbles, or locally inconsistent pressure.
- Labels that hold on some parts but not others point toward variable cleaning, molding residue, coating cure, part batches, or application conditions.
- Labels that pass immediately but fail after storage or service require evaluation of dwell, temperature, moisture, chemicals, flexing, abrasion, and facestock stress.
Before assuming the print run is defective, compare failed and successful parts from the same lot. Record the substrate batch, cleaning method, part temperature, label lot, application method, operator, dwell interval, and service exposure. That turns “the labels are weak” into a testable production question.
A practical before-you-reprint checklist
- Identify the exact finished substrate. Record the resin, paint, powder coat, varnish, treatment, texture, and manufacturing process where known.
- Confirm the label construction. Check the facestock, adhesive product, coat or construction reference, liner, minimum application conditions, service range, and intended substrates in the current technical data sheet.
- Inspect the failure. Note where lifting starts, whether it is consistent across parts, how long it takes, and what the part encounters in service.
- Clean representative parts with a documented, substrate-compatible method. Do not rely on an unrecorded shop solvent or a quick sleeve wipe.
- Condition labels and parts to the supplier’s stated application range. Keep cold parts, condensation, and rapid temperature changes out of the test unless they are real service requirements.
- Apply repeatable pressure across the full label, especially the edges. Use the intended manual or automatic application process rather than an unusually forceful laboratory thumb press.
- Allow defined dwell intervals. Compare immediate results with later checks under controlled conditions.
- Test on actual production parts. Flat plaques and resin datasheets cannot reproduce curvature, texture, coatings, residue, or part-to-part variability.
- Expose samples to realistic service conditions, including temperature, moisture, chemicals, abrasion, flexing, and UV where relevant.
- Document the approved combination. Lock the substrate, preparation method, label construction, application conditions, dwell, and acceptance test into the production specification.
For a new design or supplier, a short pilot is cheaper than discovering the mismatch after a bulk run. If the job is moving from engineering samples to an order, a small batch from a custom sticker printer can provide pieces for application trials. Keep the trial construction identical to the proposed production label; changing the adhesive, laminate, or facestock invalidates the comparison. The same principle matters before committing to bulk custom sticker reorders.
What dyne testing can and cannot tell you
Wetting-tension testing can help monitor whether a polymer film surface is more or less receptive to wetting. ASTM D2578-23 defines a test using specified liquids for polyethylene and polypropylene films. ASTM limits the stated scope to PE and PP unless the user establishes applicability to another polymer.
That makes a dyne result useful as a screening or process-control measurement, especially when comparing treated PE or PP film under a defined method. It does not guarantee label adhesion. The test does not by itself account for adhesive chemistry, coat weight, roughness, curved-part stress, application pressure, dwell, temperature, or long-term exposure. A value measured on flat film also may not represent a molded, coated, contaminated, or weathered production part.
Use dyne testing to answer a narrow question: is the tested surface wetting consistently under the defined method? Use application-specific peel, dwell, and environmental tests to decide whether the complete label construction works. Avoid turning a general value such as 36 dynes/cm into a universal acceptance line.
A worked diagnosis: the label sticks to glass but not a PP tote
Suppose a warehouse label bonds firmly to a glass test panel but lifts from a polypropylene tote within a day. The glass result confirms that the adhesive can form a bond under at least one condition; it does not qualify the label for PP.
First, test cleaned and uncleaned totes from several production batches. Apply labels at a controlled temperature with repeatable roller pressure, then inspect them immediately and after defined dwell periods. If cleaning produces a large improvement, contamination or processing residue is part of the problem. If clean PP still gives broad release, low surface energy or adhesive mismatch becomes more likely. If only the edges lift near a corner or rib, curvature and facestock stress may be contributing.
At that point, compare candidate constructions intended for low-surface-energy plastics. Hold label size, application method, dwell, and service exposure constant. The winning construction is not the one that feels most aggressive on the liner; it is the one that passes the documented test on real totes.
The production decision
For PE, PP, textured coatings, powder-coated parts, tight curves, or unknown surfaces, give the label supplier more than a material name. Provide representative parts, the manufacturing and cleaning process, application temperature, service environment, expected life, label dimensions, and any edge-lifting pattern.
Then separate the remedies. Remove contamination with a repeatable compatible process. Correct pressure, temperature, and dwell where application control is weak. Reduce construction stress where geometry is the problem. When the clean substrate still resists wet-out, specify an adhesive designed for that surface or evaluate a controlled surface-treatment process with the relevant suppliers.
The final approval should always come from labels applied to actual production parts and exposed to realistic conditions. Surface energy explains why many labels do not stick, but the durable bond belongs to the entire system: substrate, adhesive, facestock, preparation, application, time, and environment.
References
- Substrate Surface Consideration for Adhesive Selection
- Categorizing Surface Energy | 3M Science of Adhesion Educational Series
- The role of van der Waals forces in pressure-sensitive adhesives | Avery Dennison
- 3M™ Pressure Sensitive Adhesives
- Substrate Cleaning and Preparation
- D2578 Standard Test Method for Wetting Tension of Polyethylene and Polypropylene Films