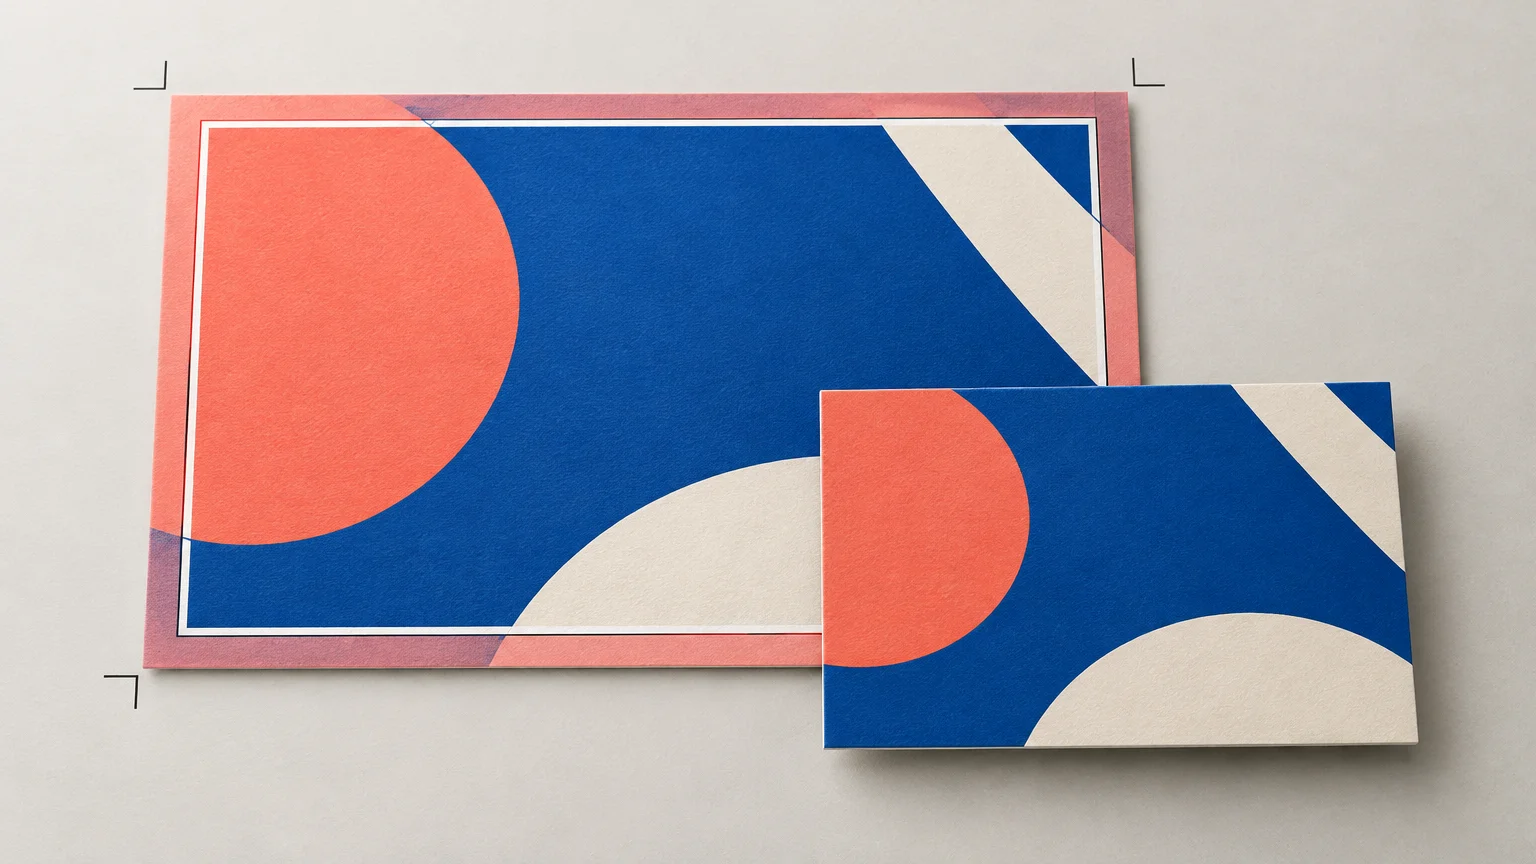
How Much Bleed Should a Print File Have?
TLDR: Use 0.125 inch, or 1/8 inch, of bleed on every trimmed edge that carries edge-to-edge artwork. In metric workflows, 3 mm is the common equivalent convention. Keep the document at its final trim size, extend backgrounds and images through the bleed, and follow the printer’s template whenever it specifies a different amount.
If you are asking how much bleed should a print file have, the practical answer for ordinary commercial print is 0.125 inch on each side. Adobe likewise describes 0.125 inch, or 3 mm, as a typical convention while advising designers to confirm the printer’s requirements. That last condition matters: bleed is determined by the finishing workflow, not by a universal setting inside the design application.
Bleed is sacrificial image area. It gives the cutter, die, or other finishing process room to vary slightly without exposing an unintended white line at the finished edge. The customer does not receive a larger product; the excess artwork is cut away.
Why a print file needs bleed
A design can end exactly at the trim line on screen because the screen has no cutting tolerance. A physical sheet has to be printed, moved through production, aligned, stacked or imposed, and then finished. Small shifts can occur between the printed image and the cut position. Bleed extends the image beyond the intended edge so a minor shift reveals more image instead of bare paper.
This does not mean the finishing equipment is crude. Modern cutting systems are built for precise production, but the practical tolerance belongs to the complete job: media behavior, sheet handling, registration, stack height, cut sequence, die setup, and the product’s construction can all affect the specification. Heidelberg, for example, describes precision cutting systems while also recognizing practical tolerances in relevant finishing applications.
The important production question is therefore not simply “What does my software allow?” It is “How much extra printed image does this finishing method require?” For a business card, postcard, flyer, or similar flat sheet, 0.125 inch is a sound starting point. Packaging, books, contour-cut labels, banners, mounted graphics, textiles, and wraps may require different geometry.
Bleed, trim, safe area, and slug are different boundaries
Four layout regions are commonly confused. Treating them as separate production instructions makes file setup much easier.
- Trim line: The intended physical cut. The finished product size is measured at this boundary.
- Bleed area: Extra printable artwork outside the trim line. It exists to be cut away.
- Safe or live area: Space inside the trim where text, logos, QR codes, and other critical content should remain. Its required clearance is printer- and product-specific.
- Slug area: Optional space outside the page used for production notes or job information. It is not a substitute for bleed and normally does not become part of the finished piece.
A background color, photograph, texture, or decorative shape that touches a finished edge should continue through the bleed. Text and logos generally should not. Those critical objects belong inside the safe area because bleed protects against an exposed substrate edge; it does not protect content from being trimmed.
Delicate borders are particularly sensitive. A border can remain technically inside the trim and still look uneven if the cut shifts relative to the printed image. The narrower the border, the more visible that variation becomes. If a border must appear uniform, ask the printer for its recommended inset rather than assuming the bleed value is also an appropriate safe-area value.
Keep the document at its finished trim size
Do not enlarge the document dimensions and call the added space bleed. Adobe advises defining the document at the final trim size and establishing bleed separately; building the bleed into the document dimensions can require manual adjustment during prepress.
For example, a 5 by 7 inch postcard should remain a 5 by 7 inch document. With 0.125 inch of bleed on all four sides, edge-to-edge artwork extends another 0.125 inch beyond each edge.
- Final trim size: 5 × 7 inches
- Bleed added to width: 0.125 + 0.125 = 0.25 inch
- Bleed added to height: 0.125 + 0.125 = 0.25 inch
- Total artwork extent including bleed: 5.25 × 7.25 inches
The postcard has not become a 5.25 by 7.25 inch product. Its TrimBox still identifies the intended 5 by 7 inch result. The larger extent supplies image data for the area that will be removed.
How much bleed different print jobs need
| Job condition | Bleed decision | What to verify |
|---|---|---|
| Standard cards, flyers, and flat sheets | Start with 0.125 inch or about 3 mm on each trimmed edge | Confirm the printer’s file specification before export |
| No artwork touches the edge | Bleed may not be visually necessary | Check whether the printer still requires a standard bleed-enabled PDF |
| Printer supplies a template | Use the template’s specified amount | Do not replace its value with a generic default |
| Die-cut stickers or labels | Follow the cut-path and bleed specification | Check contour path naming, artwork extension, and safe clearance |
| Folded or bound work | Use the printer’s page and binding instructions | Confirm inside edges, spreads, creep, and cover construction |
| Packaging and shaped pieces | Use the approved dieline | Identify cut, crease, glue, perforation, and no-print regions |
| Banners, wraps, textiles, or mounted graphics | Use the production provider’s finishing allowance | Confirm hems, pockets, wraparound image, sewing, and mounting requirements |
A printer template outranks the default. If a contour-cut sticker file is moving from design into ordering, use the dimensions and cut-path requirements provided by a custom sticker printer rather than applying a flat-sheet rule without checking. The same principle applies to cartons, book covers, displays, and fabric products.
Is 3 mm exactly the same as 1/8 inch?
No. One eighth of an inch is 3.175 mm. In ordinary instructions, 3 mm and 0.125 inch are often presented as parallel bleed conventions, but they are not mathematically identical.
Do not convert a printer’s explicit value unless the workflow requires it. If the template says 3 mm, enter 3 mm. If it says 0.125 inch, enter 0.125 inch. The difference is small, but retaining the supplied unit avoids unnecessary rounding and keeps the file aligned with the provider’s preflight rules.
What the PDF tells prepress
A production PDF can carry several page boundaries. In practical terms, the TrimBox identifies the intended finished page, while the BleedBox identifies the available area outside that trim. The PDF/X framework uses this page geometry, but it does not impose one universal minimum bleed amount. The BleedBox must sit outside the TrimBox.
The PDF Association’s explanation of PDF/X page geometry is useful here because it separates file structure from job specification. A correctly defined BleedBox communicates where bleed exists; it does not guarantee that the artwork actually fills that area.
That distinction causes a common failure. A designer enters 0.125 inch in the document settings and exports using the bleed option, but the background image still stops at trim. The resulting PDF can have a valid-looking bleed boundary filled with blank space. The setting is present, yet the usable bleed artwork is missing.
Inspect the exported PDF visually. Look at each edge where color or an image reaches trim, and confirm that the same artwork continues beyond it. Page-box metadata cannot manufacture image content that was never extended.
Do booklet pages need bleed at the inside edge?
Do not remove inside-edge bleed based on a generic assumption about spreads. Booklets may be submitted as single pages and imposed by the printer, while covers, perfect-bound sections, saddle-stitched pages, and other constructions can have different requirements. Use the provider’s export specification or template for every edge.
The same caution applies to reader spreads. A visually continuous image across two facing pages does not necessarily mean the production system wants one wide page. Unless instructed otherwise, build the document at the final page size and supply pages in the order and format requested by the printer.
Should the PDF include crop marks?
Include crop marks only when the printer requests or accepts them. Many automated workflows derive trim from PDF page boxes and do not need designer-added marks. Unrequested marks can increase the page extent or interfere with placement if they sit too close to the artwork.
When marks are required, their offset should be greater than the bleed amount so they do not enter the bleed image. Adobe specifically advises setting the marks offset beyond the bleed value.
Common bleed mistakes
- Adding bleed to the ordered dimensions instead of defining it outside the final trim size.
- Entering a bleed value without extending backgrounds and photographs into that area.
- Placing text, logos, QR codes, or essential details in the bleed.
- Assuming bleed and safe area use the same measurement.
- Using 0.125 inch automatically when a dieline or printer template specifies another amount.
- Adding crop marks without checking whether the production workflow wants them.
- Exporting a PDF and checking only the design application rather than the exported file.
- Using a narrow border that makes normal trim variation visually obvious.
Color handling is a separate prepress decision. Extending an image correctly does not resolve profile conversion, ink limits, or appearance changes between the screen and the printed substrate. For that part of the workflow, see how RGB and CMYK behave when artwork leaves the screen.
A practical PDF preflight checklist
- Obtain the current printer specification, template, or dieline for the exact product.
- Set the document dimensions to the final ordered trim size.
- Enter the required bleed separately on every applicable edge.
- Extend every edge-touching background, tint, image, and graphic through the full bleed.
- Keep text, logos, QR codes, and other critical details inside the specified safe area.
- Export using the requested PDF standard, profile, page order, and bleed settings.
- Add crop marks only if requested, with their offset beyond the bleed.
- Open the exported PDF and inspect the trim and bleed boundaries.
- Zoom in on every finished edge and confirm that real artwork fills the bleed.
- Verify that the PDF page size and page boxes match the printer’s instructions before upload.
The practical recommendation
For standard commercial print, start with 0.125 inch of bleed on each trimmed edge carrying edge-to-edge artwork. Treat 3 mm as the common metric convention, not an exact conversion of 1/8 inch. Then replace that default with the printer’s stated value whenever a template or product specification is available.
Before sending the job, inspect the exported PDF rather than trusting the document setup panel. Confirm three things: the trim size is correct, the PDF contains the required bleed geometry, and the actual artwork continues through every edge that will be cut. That short check catches the difference between a bleed setting and usable bleed—the difference the finishing system ultimately cares about.